目次:
- 火の描き方を学ぶ
- ステップバイステップで火を描く
- おすすめ
火の描き方を学ぶ
炎の描き方とは…? 今、外はかなり寒く、私は暖かい火のそばに座っています。 しかし、あなたがいる場所が寒くてもそうでなくても、炎の描き方を学ぶことによって、あなたの絵や図面に火を加えることができる良い機会です。 火を描くのは、明確な構造がないため、難しいかもしれません。 コツは、静止した形状の中で炎が動いている様子を表現することです。
私が火を描くのが好きなのは、作品に感情を与えるために使うことができるからです。
私が火を描くのが好きなのは、作品に感情を与えるのに使えるからです。 火の描き方を学んだとき、私はまずマーカーを使いました。 マーカーを使うと、色の移り変わりがスムーズで、リアルな絵を描くのに重要な光と影の表現ができるんだ。 今回使用したのは、アルテッツァのエバーブレンドマーカー60本セットです。 このアートマーカーは、色数が多いだけでなく、両端にマーカーが付いているので、色を混ぜるのが簡単で、本物のような炎を描くための細部まで描き込むことができます。
段階的な炎の描き方
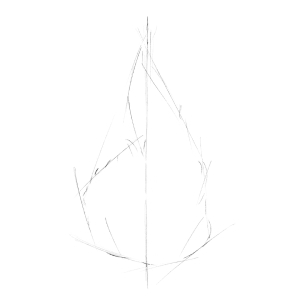
ステップ 1
厚紙の中央に 2HB ペンシルで縦線をかすかに描きます。
ステップ2
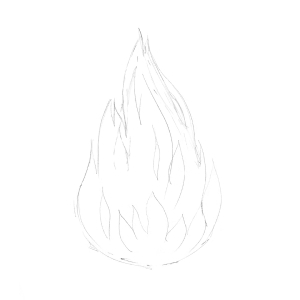
作品の詳細を加える前に、炎の舌をすべて描く必要があります。 あるものは短く、あるものは長く、そしてあるものはその中間にしています。 この部分は本物の火の前でやると気持ちいいですし、かなり魅了されます。 しかし、あまり長く炎を見つめすぎると、時間が経つのを忘れてしまいます。 これは、異なる色をどこに配置すればよいか、どのマーカーをどの部分に使用すればよいか、明暗の切り替え (および 2 つの色の切り替え) はどこに配置すればよいか、などの質問に答えるのに役立ちます。 This step should result in a finished pencil drawing.
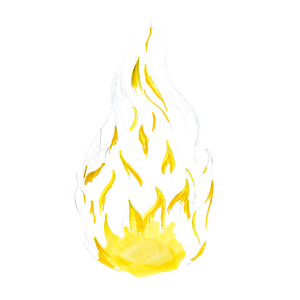
Step 4
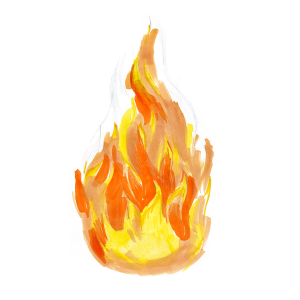
I start the coloring process following the “light to dark” rule. I add my yellow shades first. I use 945 (light yellow), 935 (medium-light yellow) and 0 (white) to fill in the lightest areas.
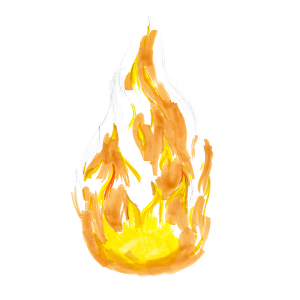
Step 5
Next, I add 2497 (light orange) to paint the mid-tone areas. I love to watch as the flames flicker and dance around. I try to keep all my strokes going up in different directions to give the feeling they are jumping up the chimney or into the sky if it’s a campfire.
Step 6
Using 9423 (saturated orange) I work on the transition from the light orange to the darker orange by blending along the edges of the flames.
Step 7
Now it’s time to add the darkest flames. I paint dark parts of the flames using 9432 (yellow ochre) and 422 (red-orange), and also those parts of the background that are seen through the flame, using 401 (burgundy). By using a dark background in a cooler shade, the fire is brighter and has more volume.
Step 8
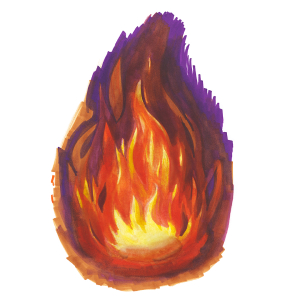
A fire just doesn’t look and feel hot until you’ve added some red. I add red to the middle of the flame using 422 and 302 (rose). I think this fire is starting to sizzle! What do you think?
Step 9
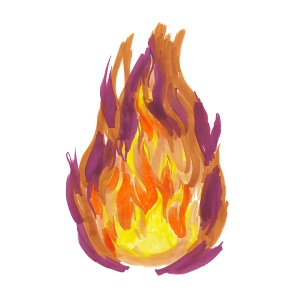
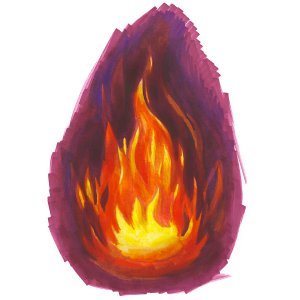
It’s time to start painting the background and add details to the flames’ edges. For this, I use 422, 881 (purple), and 4103. I am adding a dark purple since purple and yellow are complementary colors, which I think will make the yellow really stand out.
Step 10
By layering 4103 with 881 and 401 in the background, I can give the scene a richer feel. It’s really starting to look like it’s a fire in the woods. I can just hear the crickets and the fire crackling!
Step 11
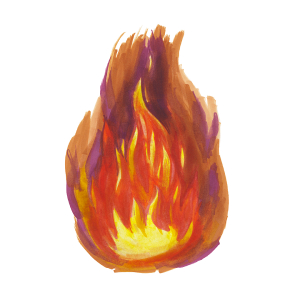
Now that the background is in shades of violet, I overlay it with lilac 410 and add some 422 to keep it looking hot.
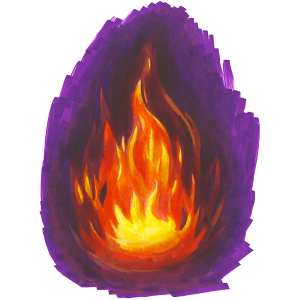
Step 12
At this stage, I think the background isn’t quite dark enough to really make the flames leap from the page.
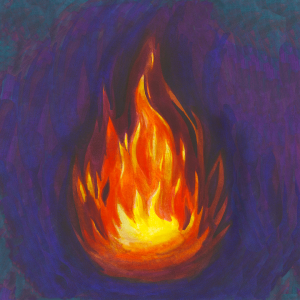
ステップ 13
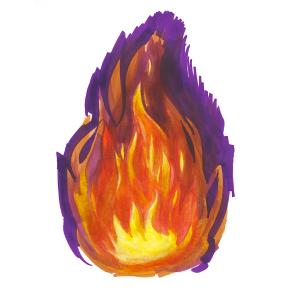
キャンプファイヤーの絵のような感じを与えるために、青と青緑を背景に重ねて、木と草を模倣します。 次に、炎の赤い部分を暗くし、401 と 0、881、およびさらに 401 を使っていくつかの細部を微調整します
この最終段階で、特に背景と炎の影で、どの部分を明るくして、どの部分を暗くする必要があるか、一歩引いて見てみます。 ブレンディング マーカーは、明るい部分を本当に「ポップ」にするために最適です。
おすすめポイント
- 始める前に、紙の切れ端を使って色の組み合わせを試し、使いたいカラー パレットを得ます。 また、ブレンド マーカーを使用して、どのような効果が得られるかを練習します。
- 絵の参考にするために実際の火を見ることができない場合は、本や雑誌、インターネット上の炎の写真を研究してください。
- 絵や絵画に火を使うことを恐れないでください。ほんの少しの炎からどれだけの感情を呼び起こすことができるか、驚くほどです。 火は動きを止めないので、形も色も常に変化しています。 初心者でも経験者でも楽しく挑戦できます。 火の描き方を楽しんで学んでいただけたら幸いです。このミニチュートリアルで、あなたのこれからの作品を熱くするきっかけになれば幸いです。
あなたが楽しめる他の記事:
- EverBlend アート マーカーで描く方法
- あなたのアートを向上させるマーカーの描画テクニック
- かわいいカップケーキを描く方法
共有の記事もご覧ください。