XAMPPとWordPressをインストールしたい、別名:WordPressをローカルにインストールしたいですか? テストなどに使える開発サイトが欲しい場合におすすめです。 XAMPPを使えば、まさに自分のコンピュータからウェブサイトを運営することができます。
しかし、実際にXAMPPとWordPressをインストールするのは少し難しいので、手助けが必要かもしれません。
ローカルのWordPressテストサイトの利点についてはすでにお話しましたので、その点については省略します。
ここでは、XAMPPを使用してWordPressをローカルにインストールする方法を説明します。
もしあなたが本当に探しているものが、ライブサイトでWordPressを展開する方法なら、Bluehostなどのホストへ直接行き、彼らに技術設定を任せてみてはいかがでしょうか。 Bluehostはウェブホスティング企業です。 この作品は、あなたのニーズに合ったホスティングプラン(ほとんどの場合、それは2.95ドル/月で安価なプランになるだろう)を選択し、WordPressが自動的にセットアップにインストールされているオプションを選択するという方法です。
WordPress を他の環境にインストールするためのより一般的なガイドが必要でしたら、ローカルだけではなくライブ サーバーにも、こちらのガイドに飛んでください。
- ステップ1:コンピュータにXAMPPをダウンロードしインストールする
- Step 2: Start the modules and test your server
- ステップ3:WordPressファイルを追加する
- Step 4: Create a database for WordPress
- Step 5: Install WordPress locally via the on-screen installer
- マルチサイトやステージングはどうなるのでしょうか?
- XAMPPとWordPress Multisiteのインストール方法
- XAMPPとWordPressをステージングに使うべきか
- XAMPPでWordPressをローカルにインストールする方法のまとめ
- 無料ガイド
- 5 Essential Tips to Speed Up Your WordPress Site
- 簡単なヒントに従って、読み込み時間を50~80%でも短縮する。
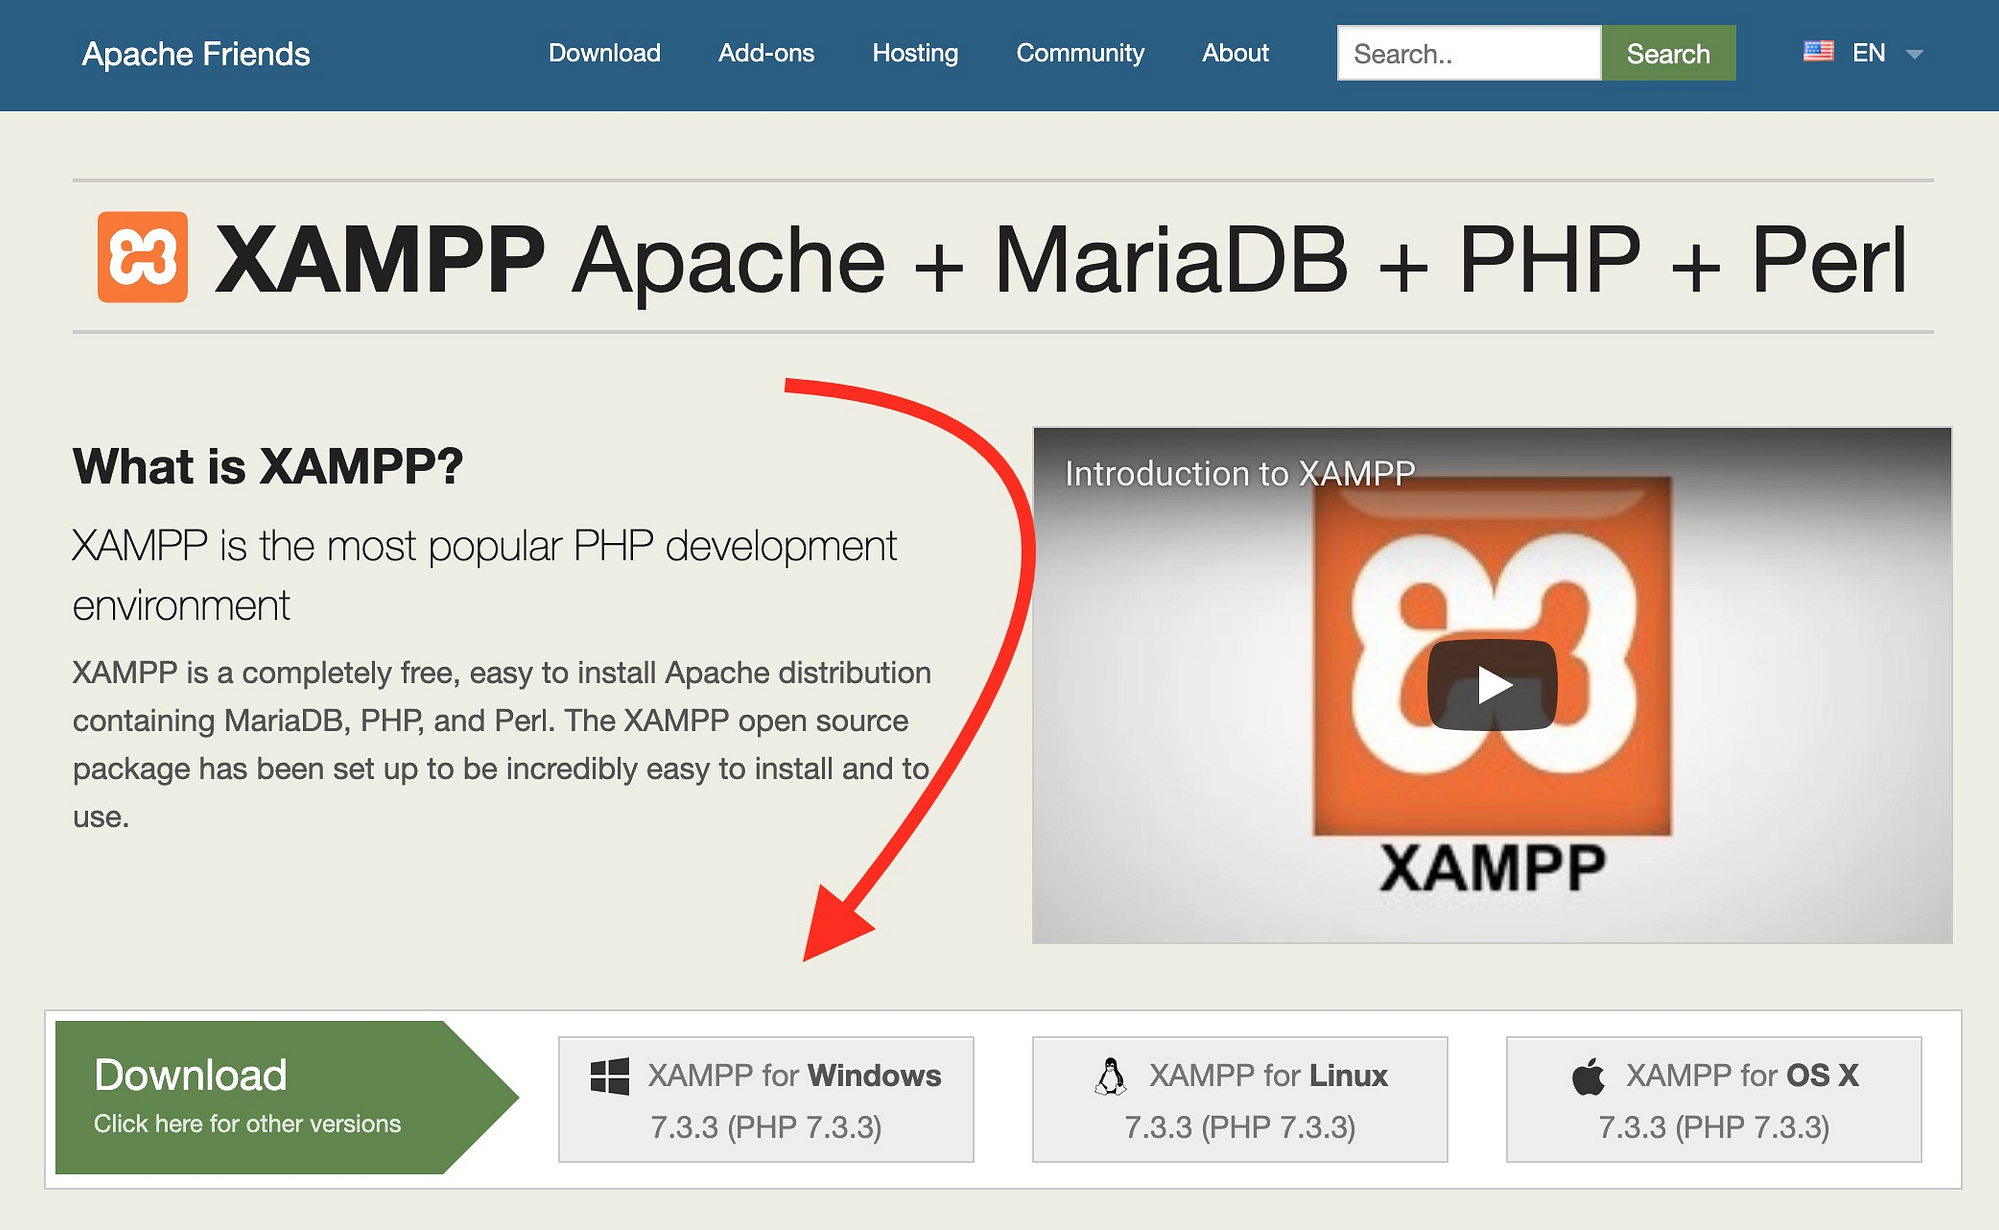
ステップ1:コンピュータにXAMPPをダウンロードしインストールする
WordPressをローカルにインストールするための最初のステップは、XAMPPソフトウェアをダウンロードしインストールすることです。 Windows用のインストーラーファイルはApache Friendsからダウンロードすることができます。 約110MBの大きなファイルなので、接続状況によっては1分ほどかかるかもしれません:

ダウンロード終了後、ダウンロードしたファイルを起動してXAMPPインストーラーを起動させて下さい。 ウィルス対策ソフトを使用している場合、以下のような警告が表示されるかもしれません:

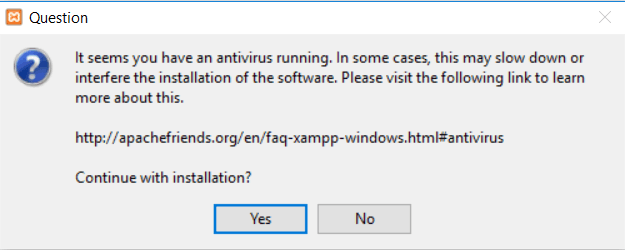
そのまま「はい」をクリックして続行してください。 Windows の設定によっては、ユーザー アカウント制御 (UAC) に関するプロンプトが表示される場合があります。 このプロンプトもそのまま続行します。 Once you get through all of the prompts, you should see the standard installer screen:


Just click Next to continue.
On the next screen, you can choose which components to install. To install XAMPP and WordPress, you do not need all of the components. In addition to the required components, all you need are:
- MySQL
- PHPMyAdmin

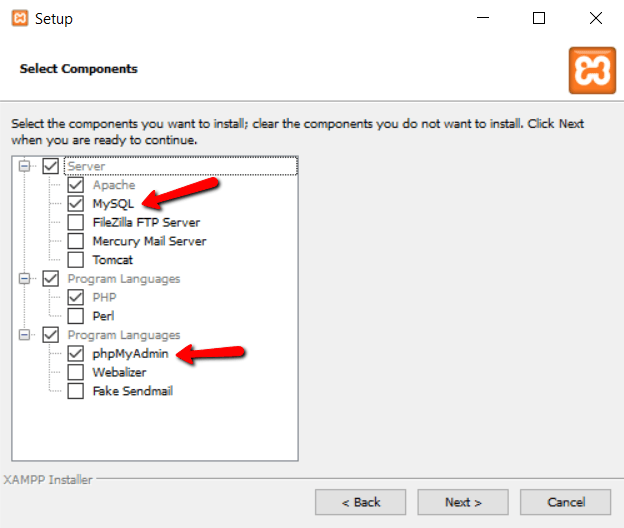
Again, this is all that’s needed to install WordPress locally. Uncheck everything else and click Next.
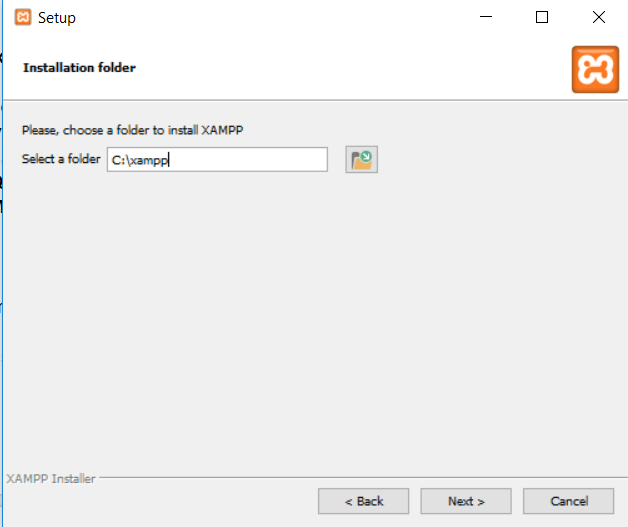
You can now select which folder to install XAMPP in. I always leave it as the default:

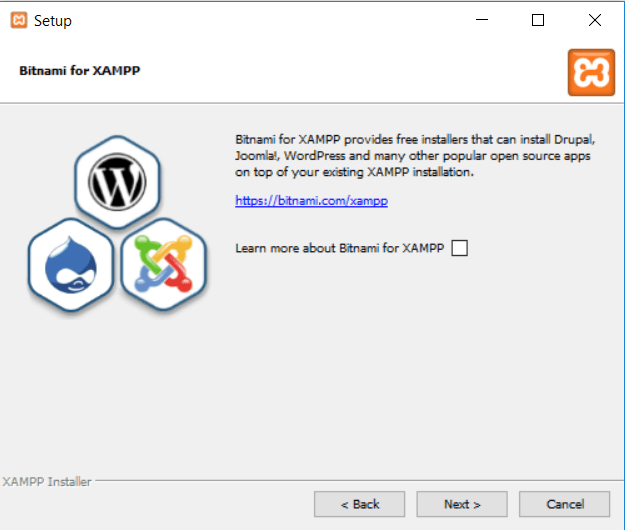
On the next screen, you’ll get a prompt asking you to install Bitnami for XAMPP. You do not need this to install XAMPP and WordPress, so just uncheck the box:

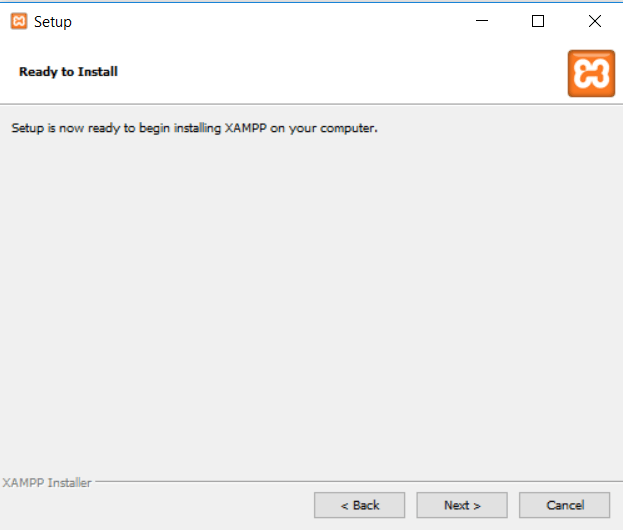
Once you click Next, you’re ready to run the install:

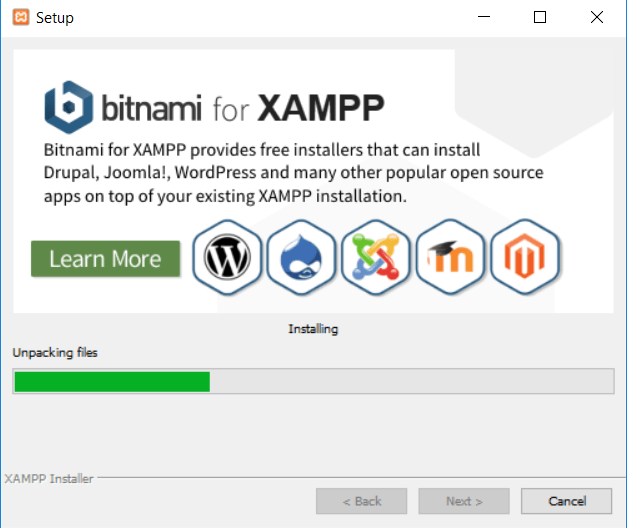
The install process might take a few minutes:

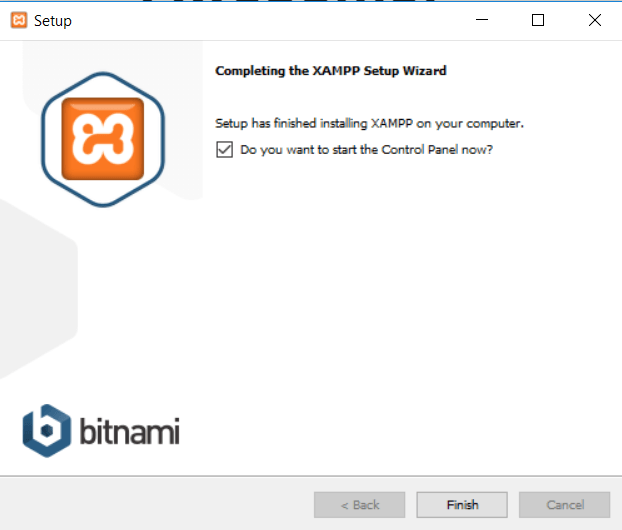
Once it finishes, you can launch the control panel to start working with XAMPP:

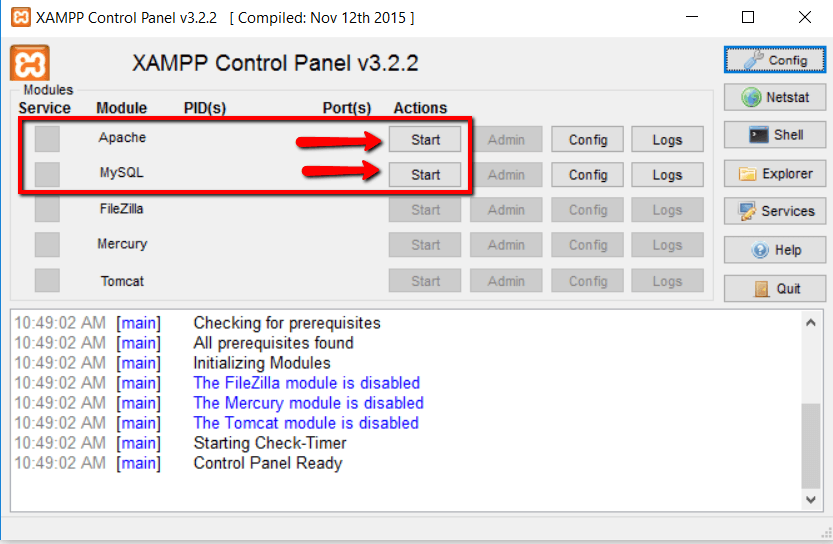
Step 2: Start the modules and test your server
To install XAMPP and WordPress properly, you’ll need to run two modules:
- Apache
- MySQL
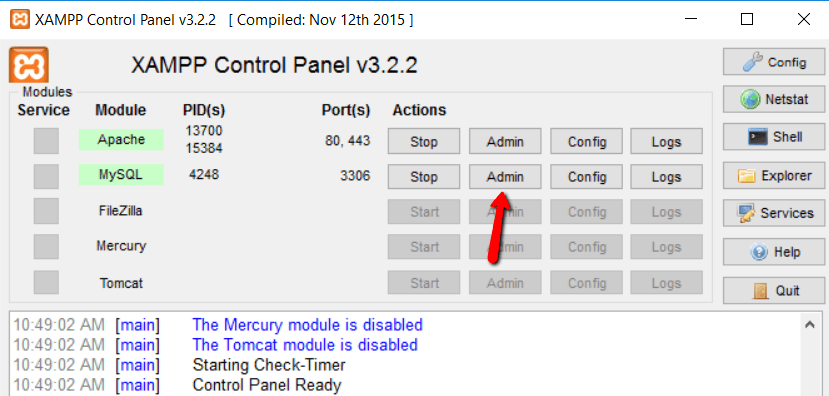
You can start both modules from the XAMPP control panel:

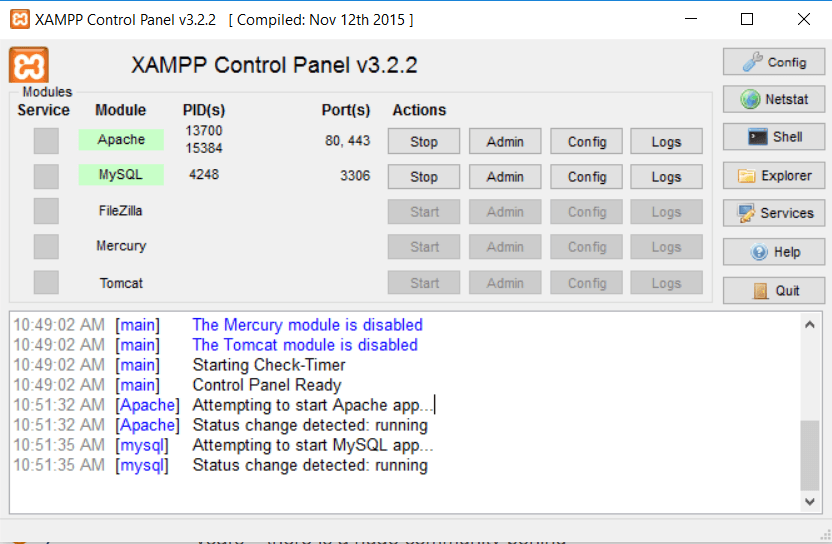
Once you launch them, you should see their status turn to green:

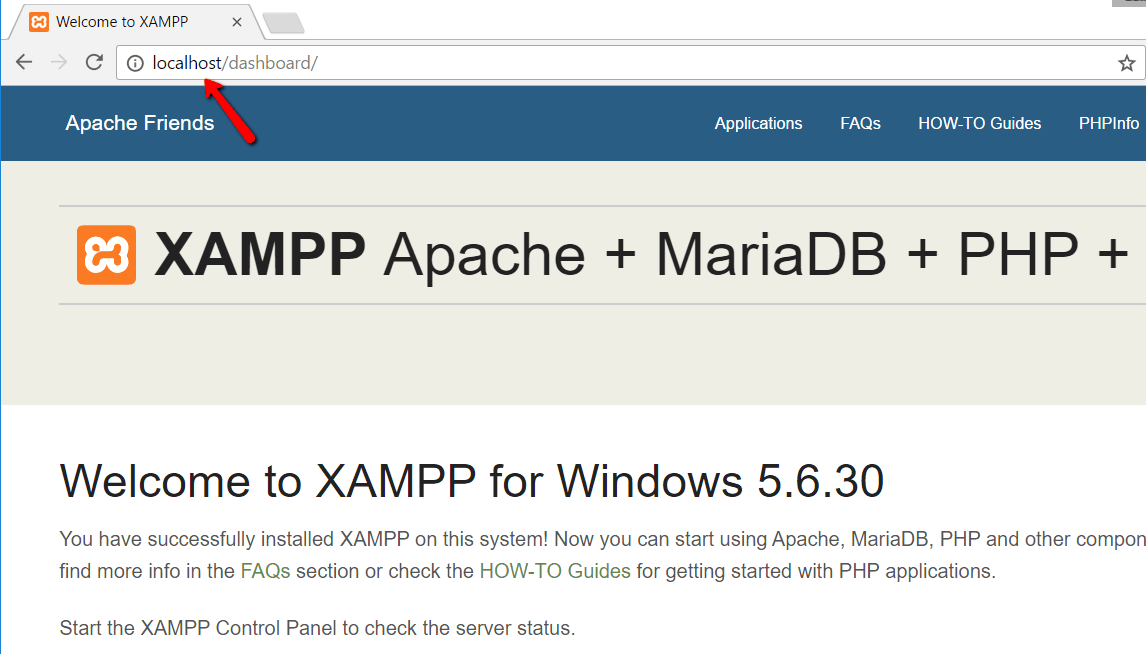
And now you should be able to test that your local server is working by going to http://localhost/ in your web browser of choice:

If all went well, you now have a functioning XAMPP server on your Windows PC! But now it’s time to install XAMPP and WordPress.
ステップ3:WordPressファイルを追加する
WordPressを手動でインストールしたことがあるなら、残りの作業はかなり馴染みのあるものに感じられるでしょう。
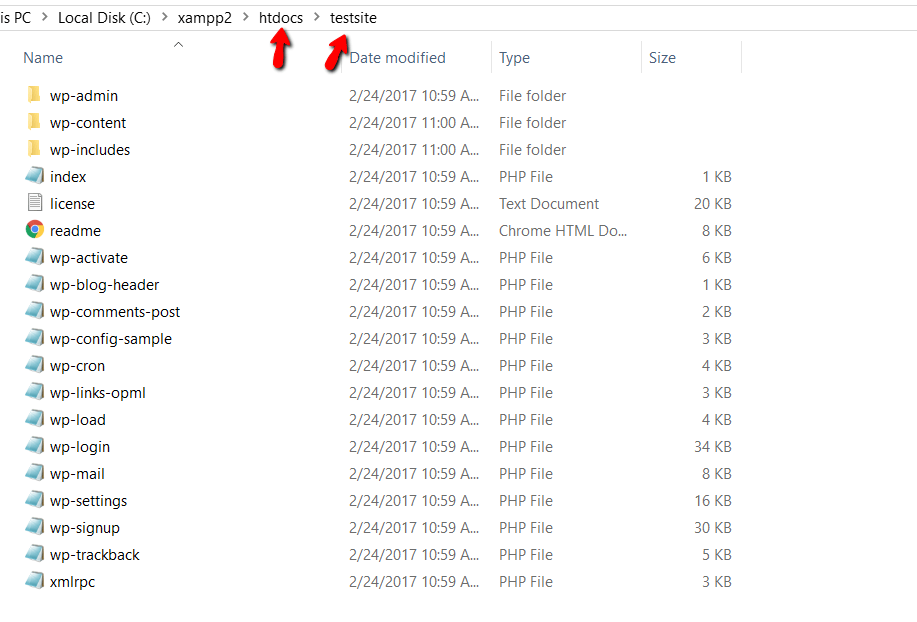
次に、Windowsで、XAMPPをインストールしたフォルダに移動します。 私の場合、それはC://xampp です。 同じような場所であるはずです。
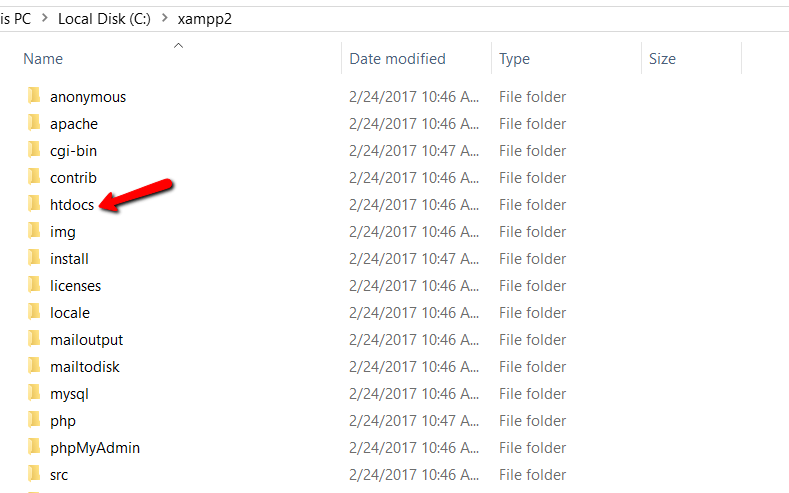
htdocs で、テストサイト用に新しいフォルダを作成します。 このフォルダー名は、サイトにアクセスするために使用されるサブネームになります。 たとえば、testsitehttp://localhost/testsite にアクセスしてサイトにアクセスします。
フォルダを作成したら、Wordpress からダウンロードした WordPress .zip ファイルを展開します。org into it:

Step 4: Create a database for WordPress
Next, you need to create a MySQL database for your WordPress install. To do that, launch PHPMyAdmin from your XAMPP control panel:

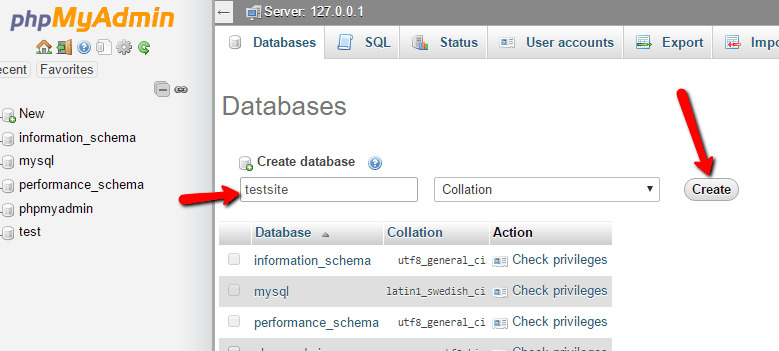
Then click on Databases at the top:


And enter a name for your database and click Create. Your name can be anything – just remember it because you’ll need it for the next step:

Unlike installing WordPress on a live web server, when you install XAMPP and WordPress, you don’t need to worry about creating a database user.
Step 5: Install WordPress locally via the on-screen installer
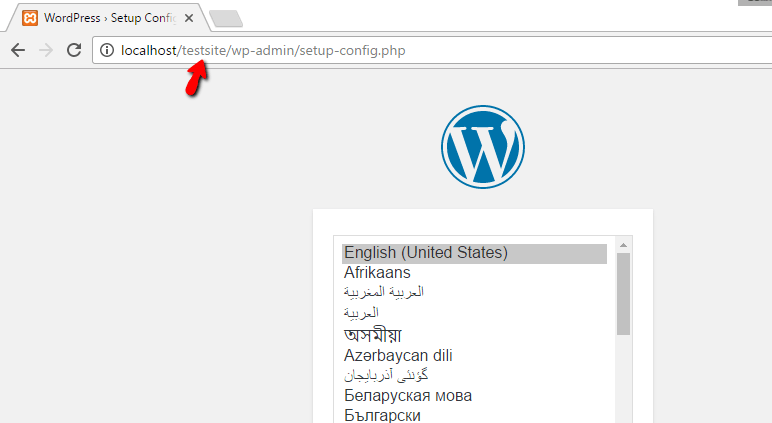
When you visit your test site, you should see the normal WordPress installer. Remember, your test site is just http://localhost/FOLDERNAME:

The only step where this process will differ from a normal install is the database details. When you get to the database details, enter them like this:
- Database Name = Name of the database you created in PHPMyAdmin
- Username = “root”
- Password = leave blank

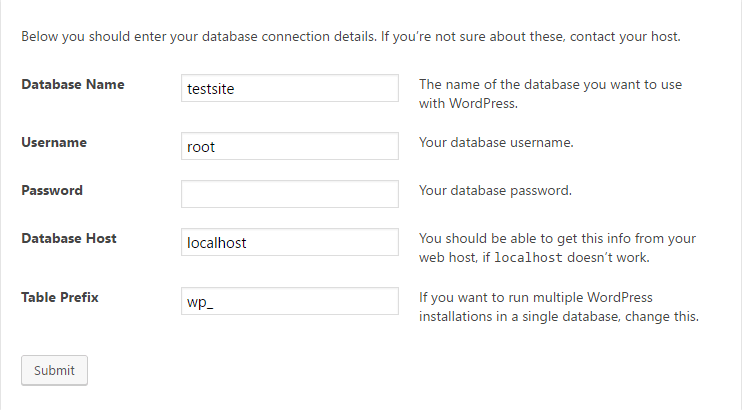
Then finish the rest of the WordPress install process like normal.
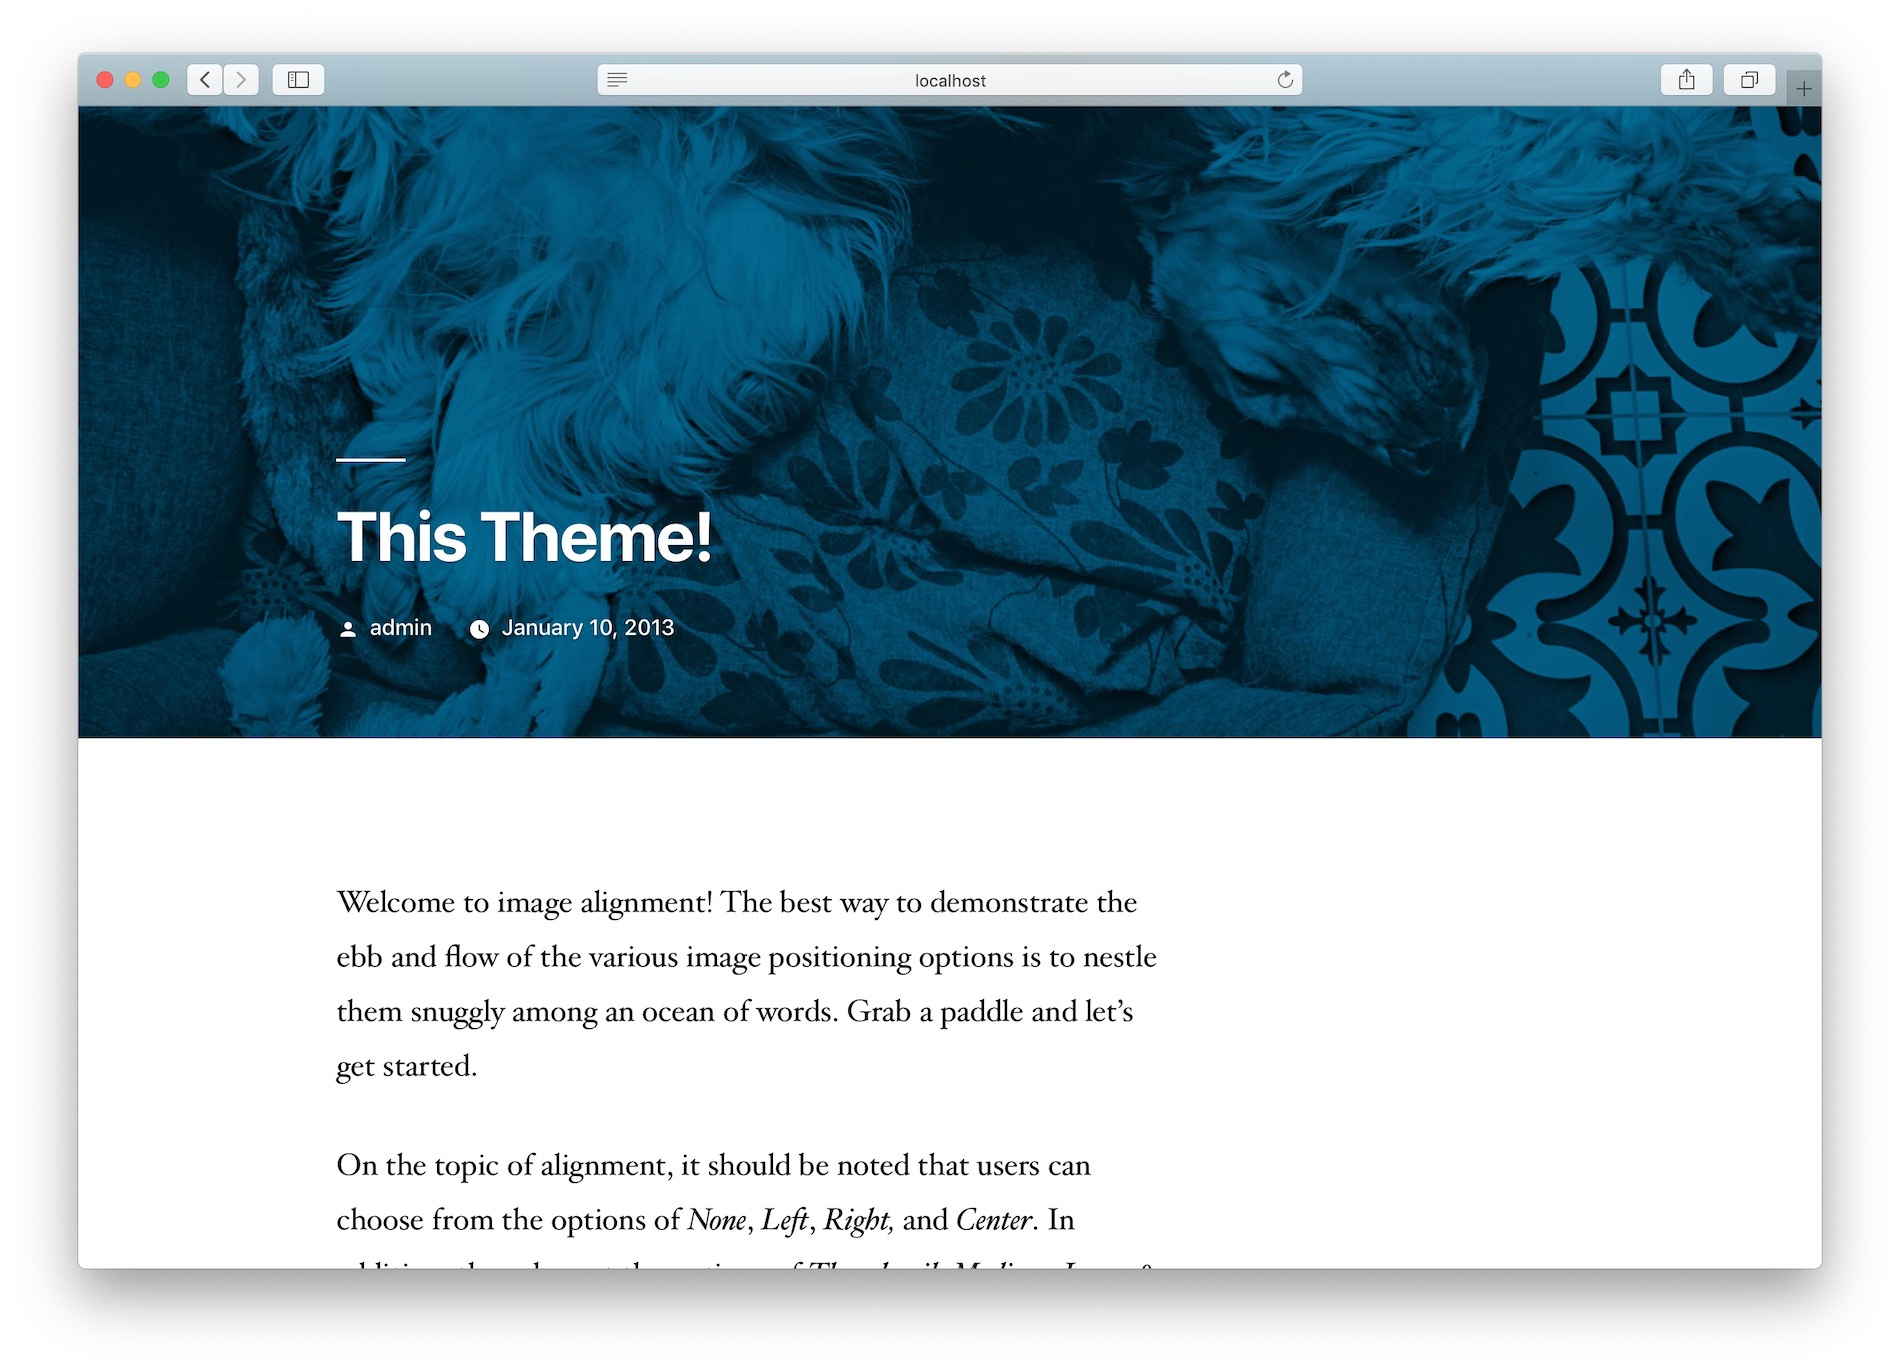
プロセスが完了すると、ローカルホスト上で真新しいWordPressインストールが完全に動作しているのが確認できるはずです:

マルチサイトやステージングはどうなるのでしょうか?
XAMPPとWordPress Multisiteのインストール方法
WordPress Multisiteで遊びたい場合、WordPress Multisiteをローカルホストで動作するように構成することも可能です。
XAMPPとWordPressをステージングに使うべきか
ローカルホストでWordPressを動かすのは、WordPressで実験したり試したりするには良い方法ですが、実際のライブサイトのステージングサイトとして使うべきではありません。
それは、XAMPPのWordPressインストールで何かがうまくいったりいかなかったりしたからといって、それが本番サイトでも同じであるとは限らないからです。
XAMPPでWordPressをローカルにインストールする方法のまとめ
一度XAMPPとWordPressのインストール方法を学んだら、必要に応じて新しいテストサイトをすぐに立ち上げられます。
私はフリーランスのライターとして、テーマやプラグインを数多くレビューするのにXAMPPインストールを使用しています。 現時点では、おそらく約60の別々のWordPressインストールがXAMPP上で動作しています。 XAMPPとWordPressについて何かサポートが必要な場合は、コメントを残してください。
ローカルにWordPressをインストールしたら、あなたのサイトで何をしたいですか?
無料ガイド
5 Essential Tips to Speed Up Your WordPress Site
簡単なヒントに従って、読み込み時間を50~80%でも短縮する。
*この記事にはアフィリエイトリンクが含まれています。
この記事にはアフィリエイトリンクが含まれています。